Contents
- 1 The Art of Elevating Your BookBinding Skills to the Next Level
- 2 Introduction: The Beauty of Bookbinding and the Need for Advanced Techniques
- 3 Strengths and Weaknesses of Advanced BookBinding Techniques
- 4 Advanced BookBinding Techniques: A Comprehensive Guide
The Art of Elevating Your BookBinding Skills to the Next Level
Hello Visitors! If you’re reading this article, chances are you are seeking ways to up your DIY game in bookbinding, either to create a special keepsake or to set up a bookbinding business. Whatever the reason may be, you’ve come to the right place. In this article, we will explore advanced bookbinding techniques that go above and beyond the basics. These techniques require special skills and knowledge beyond the usual glue, paper, and needle used in basic bookbinding. Our aim is to provide you with a comprehensive guide to these techniques, highlighting their strengths and weaknesses and addressing frequently asked questions on this topic, helping you take your bookbinding skills to the next level. So, let’s dive into the exciting world of advanced bookbinding techniques!


Introduction: The Beauty of Bookbinding and the Need for Advanced Techniques
Books have been a part of human civilization for thousands of years. They have stayed relevant, even in the era of digital technology. The magic of books goes beyond words and content; their physical appearance can be as captivating as the stories they contain. With their beautiful colors, textures, fonts, and designs, books carry a character and a charm that make them unique. This beauty, combined with functionality and durability, is what bookbinding aims to achieve.
Basic bookbinding techniques like folding, sewing, gluing, and casing in are fundamental skills that lay a foundation for creating a simple and functional book. However, advanced bookbinding techniques open up a whole new dimension in book creation, turning it into an art form that reflects the bookmaker’s creativity, skills, and passion.
Advanced bookbinding techniques often include intricate details and materials that take bookbinding to elevated levels of creativity and skill. By studying and mastering these techniques, bookbinders can create stunning and unique books that stand out from the crowd.
Let’s delve deeper into the world of advanced bookbinding techniques and explore how they can help you take your bookbinding game up a notch!
Strengths and Weaknesses of Advanced BookBinding Techniques
Strengths
Advanced bookbinding techniques offer several strengths that can make your book stand out from the crowd. They include:
| Strengths | Explanation |
|---|---|
| Enhanced Durability | Advanced techniques, such as leather binding, can enhance the durability of your books, making them last longer. This is ideal for books that are meant to be treasured and kept as heirlooms. |
| Creativity and Uniqueness | Advanced bookbinding techniques, such as marbling, gold tooling, and inlays, add unique design elements to your books, making them stand out from others on the market. This is great for creating original works of art or building a niche bookbinding business. |
| High Quality and Professional Finishing | Advanced techniques require precision and patience, resulting in a high-quality and professional finished product. This is crucial for bookbinders who want to sell their works and build a reputation for excellence in their craft. |
Weaknesses
Advanced bookbinding techniques can also have some weaknesses that need to be considered:
| Weaknesses | Explanation |
|---|---|
| Complexity | Advanced bookbinding techniques require specialized skills, tools, and equipment beyond the basics, making them complex and challenging. This may require additional training and expenses. |
| Time-consuming | Advanced techniques are usually time-consuming and require patience and attention to detail. This may not be suitable for people looking for quick and easy bookbinding projects. |
| Expensive Materials | Advanced techniques may require expensive materials, such as high-quality leather, inlays, and gold leaf. This may make the finished product more costly, making it less accessible to people with a limited budget. |
Advanced BookBinding Techniques: A Comprehensive Guide
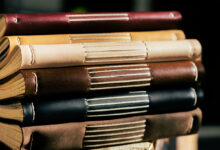
1. Leather Binding
Leather binding, also known as fine binding, is the epitome of luxury and sophistication in bookbinding. It involves covering the book boards with high-quality leather and adding ornamental elements such as gold tooling, inlays, and raised bands. Leather binding requires patience, precision, and skill, making it a challenging but rewarding technique to master.
Steps:
Step 1: Sew the book together using the best binding stitch for your project.
Step 2: Cut the leather to the size needed for the spine of your book, leaving enough leather to cover the edges of the boards.
Step 3: Apply a thin layer of glue to the spine of the book. Then, press the leather down onto the glued spine using a bone folder to smooth the leather and remove any air bubbles.
Step 4: Fold the edges of the leather over the boards and glue them down. This can be done by wetting the edges just enough to make folding them easier. Use the bone folder to smooth the folded leather and ensure that it sticks to the board.
Step 5: Add decorative elements such as gold tooling, inlays, and raised bands to elevate the book’s aesthetic appeal.
2. Marbling
Marbling is a decorative technique that involves swirling ink on a water bath’s surface and then transferring the resulting pattern to paper or other surfaces. The process results in a beautiful, unique design that can be used for endpapers, covers, or borders. Marbling requires patience and precision, but the resulting product is worth the effort.
Steps:
Step 1: Prepare the water bath by adding carrageenan powder. Carrageenan helps the pigments float on the surface of the water.
Step 2: Add drops of acrylic paint or other pigments to the water bath, swirl them around with a comb, and then lay the paper or surface on top of the bath. Once the paper has absorbed the pigment, it can be removed from the bath and left to dry.
Step 3: Rinse the paper or surface, remove excess pigment, and allow to dry. The final result is a beautiful marbled pattern that can be incorporated into your bookbinding project.
3. Gold Tooling
Gold tooling is an ornamental technique that involves using a heated tool to press gold leaf onto the book’s cover. It adds a touch of elegance and sophistication and is often used in combination with leather binding. Gold tooling requires patience and precision, as precise pressure and timing are essential to achieving the desired effect.
Steps:
Step 1: Design your tooling pattern on paper and transfer it to the cover of the book. You can trace the pattern using a stylus or pencil.
Step 2: Heat the tooling tool to the correct temperature. The temperature depends on the type of leather or material you are tooling. Leather requires more heat than paper or cloth, for instance.
Step 3: Place the tool in position, press down firmly, and count to three. This will transfer the gold from the leaf to your book’s cover.
Step 4: Repeat steps 2 and 3 until your design is complete.
4. Inlays
Inlays involve cutting out shapes from one material and then inserting another material in the space left behind. In bookbinding, inlays can be added to leather covers, creating intricate patterns and designs. This technique requires patience, precision, and attention to detail, making it one of the more challenging advanced bookbinding techniques to master.
Steps:
Step 1: Cut out the shapes you want to inlay from your leather cover, taking care to make them clean and precise. These shapes can be hearts, stars, letters, or any other design you like.
Step 2: Cut out the shapes from the material you want to inlay. The inlay can be a different color of leather, paper, or even fabric.
Step 3: Insert the inlay material into the space left by the cut-out shape. Use glue to hold the inlay in place.
Step 4: Use a bone folder to smooth the surface and ensure the inlay is flush with the surrounding leather.
5. Embossing
Embossing creates a raised or depressed pattern on the book’s cover. It adds texture and depth to the design, creating a tactile experience for the reader. Embossing can be done with a variety of tools and materials, making it a versatile technique to have in your bookbinding repertoire.
Steps:
Step 1: Choose the design you want to emboss and transfer it onto the cover of your book using a stylus or pencil.
Step 2: Warm up an embossing tool by holding it over a flame or heat source. Carefully place the tool over the design and press down with firm pressure.
Step 3: Allow the design to cool, and then remove the embossing tool. The pattern should be embossed onto the cover, creating a raised or depressed texture.
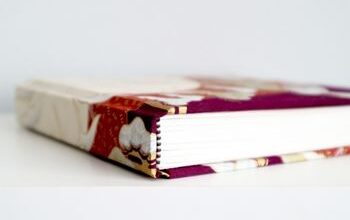
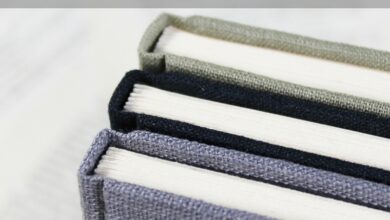
6. Headbands
Headbands add a decorative touch to the book’s spine and also protect it from abrasion between the text block and the cover. Advanced headbanding involves creating custom headbands using silk, cotton, or other materials, adding a level of artistic and finishing detail to your bookbinding project.
Steps:
Step 1: Cut a strip of silk or other material to the length of the book’s spine and about twice the width of the headband you want to create.
Step 2: Fold the strip of material in half and sew the bottom edge, creating a tube. Then turn the tube right side out.
Step 3: Choose the color of silk thread you want to use to wrap the headband. Push the needle through the tube at the top of one side of the fold.
Step 4: Wrap the ribbon tightly around the headband, making sure it is even and smooth.
Step 5: Securely stitch the end of the ribbon to the headband and trim any excess material.
7. Gilding
Gilding involves covering the book’s edges or the spine with a metal leaf, such as gold. This technique has been in use for centuries and adds a touch of luxury and elegance to any book. Gilding requires attention to detail and skill to achieve its desired effect.
Steps:
Step 1: Apply adhesive to the book edges or spine, making sure the surface is clean and dry. You can use a brush or a spray adhesive to apply the adhesive.
Step 2: Place a sheet of gold leaf on a cushion and lightly blow air over the gold leaf to loosen it from the tissue paper. Then, apply the gold leaf to the book edge or spine with a soft-bristled brush.
Step 3: Burnish the gold leaf with a tool such as a cotton ball. Be gentle and make sure to remove any air bubbles or wrinkles.
Step 4: Repeat steps 2 and 3 until the desired amount of gold leaf has been applied.
8. Intarsia
Intarsia is a similar technique to inlays but involves adding a decorative pattern to the surface of the book. This technique can be used to create intricate and beautiful designs, with wood veneer and other materials, in book covers, creating unique patterns that are sure to impress.
Steps:
Step 1: Cut your veneer into the desired shape and size of the design on the surface of your book.
Step 2: Apply glue to the back of the veneer and place it on the surface of the book where you want the design to appear.
Step 3: Use a knife or other tool to carve grooves around the veneer, creating a recessed space for it to sit in.
Step 4: Fill the space with inlay material such as leather, paper, or another veneer.
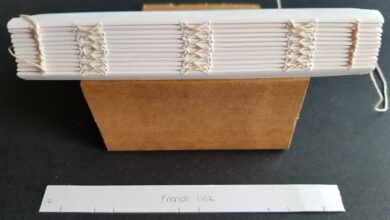
9. Sewing over Tapes
Sewing over tapes is a technique used to reinforce the book’s binding and spine, creating a more durable and long-lasting product. This technique is commonly used in book repair and restoration, but can also be used in new bookbinding projects to improve their strength and durability.
Steps:
Step 1: Cut pieces of lining or tape to the width of the spine and cover them with glue.
Step 2: Secure the tapes to the spine at equal intervals, making sure they are straight and smooth.
Step 3: Sew the text block to the tapes using kettle-stitch binding, ensuring that the paper doesn’t extend past the tapes.
Step 4: Trim any excess tape and linen, and follow with your desired finishing, such as bookbinding cloth or leather binding.
10. Sewing with Linen Tapes
Sewing with linen tapes is another technique used to reinforce the book’s binding and spine. This technique involves sewing the text block directly onto linen tapes, rather than tapes glued to the spine. Sewing using linen tapes provides even greater strength and durability to the book.
Steps:
Step 1: Cut the linen tape to the length of the book’s spine and sew it onto the book’s signatures using Kettle stitch binding.
Step 2: Cut a groove or channel into the spine of the book, making sure it is deep enough to hold the width of the linen tapes.
Step 3: Insert the linen tapes into the channel and apply glue to the tapes, making sure they are secure and straight.
Step 4: Add the book cloth or leather binding, covering the tapes and creating a finished binding.
11. Signed Binding
Signed binding is a process of creating a personalized bookbinding by adding a signature or brief message directly onto the cover or inside of the book. This method involves using a special tool to stamp text onto the book and is often used to create unique books for special occasions or gifts.
Steps:
Step 1: Design your signature or message on paper to ensure that the text is horizontally symmetrical.
Step 2: Transfer the design to a metal stamp using etching or engraving techniques.
Step 3: Heat the stamp, preferably with a hot plate or other heating device, and align it with the book’s cover or inside pages. Apply firm, even pressure with the stamp until the signature or message is pressed into paper or leather.
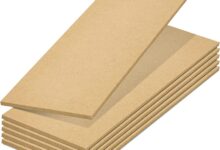
12. Box Binding
Box binding involves creating a protective cover to store books or other items. Box binding can be as simple or as decorative as you’d like, depending on the purpose and the level of skill you have. This technique requires careful measurement, precise cutting, and patience in putting the pieces together.
Steps:
Step 1: Measure the height, width, and thickness of the book or item to be stored.
Step 2: Cut out the chipboard or bookboard pieces to size using a cutting machine or sharp precision knife.
Step
Originally posted 2023-06-24 16:00:00.